


Spray foam insulation cost can make or break an attic project budget. Knowing the true numbers, potential risks, and the right questions to ask installers will save you thousands—if you know where to look and understanding spray Foam Insulation Cost early helps homeowners avoid hidden fees, poor material choices, and overpriced contractor bids.
Key Takeaways
- Expect 2026 attic spray foam insulation to run about $2.25 per sq ft for open-cell and $4.00 per sq ft for closed-cell, with real-world project budgets often $1,500–$12,000 depending on size and type.
- Main price drivers are foam type, required thickness (for code and climate), access challenges, air sealing, and quality of installation—don’t skip site prep or contractor vetting.
- To get accurate quotes and avoid regrets, ask for a per-square-foot breakdown, clear R-value targets, material brand, and clean-up details—many “cheaper” quotes hide corners.
- Spray Foam Insulation Cost increases quickly when projects require thicker foam, difficult attic access, or extra air-sealing work.
- Quick cost snapshot for Spray Foam Insulation Cost
- What drives the final price (quick checklist)
- Sample attic budgets & realistic project examples
- Open-cell vs closed-cell — cost, performance and use cases
- R-value, code targets and the unanswered technical questions readers need answered
- Spray foam vs blown-in (and when to choose which)
- DIY spray-foam kits — true cost, risks and missing safety guidance
- Most common homeowner complaints — what to watch for after install
- How to vet and hire a contractor — checklist and essential questions
- Payback, energy savings and the decision framework
- FAQ Section
Quick cost snapshot for attic Spray Foam Insulation Cost
The total Spray Foam Insulation Cost also depends on climate zone requirements, local labor rates, and the installer’s experience level.
The average spray foam insulation cost for attics in 2026 is about $2.25 per square foot for open-cell foam, and $4.00 per square foot for closed-cell. Real ranges are $1.50–$3.00 per square foot (open-cell) and $2.10–$7.00 per square foot (closed-cell) depending on thickness, region, job complexity, and installer rates. Most residential attic projects (800–1500 sq ft) end up between $2,000 and $12,000 installed, so always clarify foam type, depth, and local requirements before signing a contract. [source]
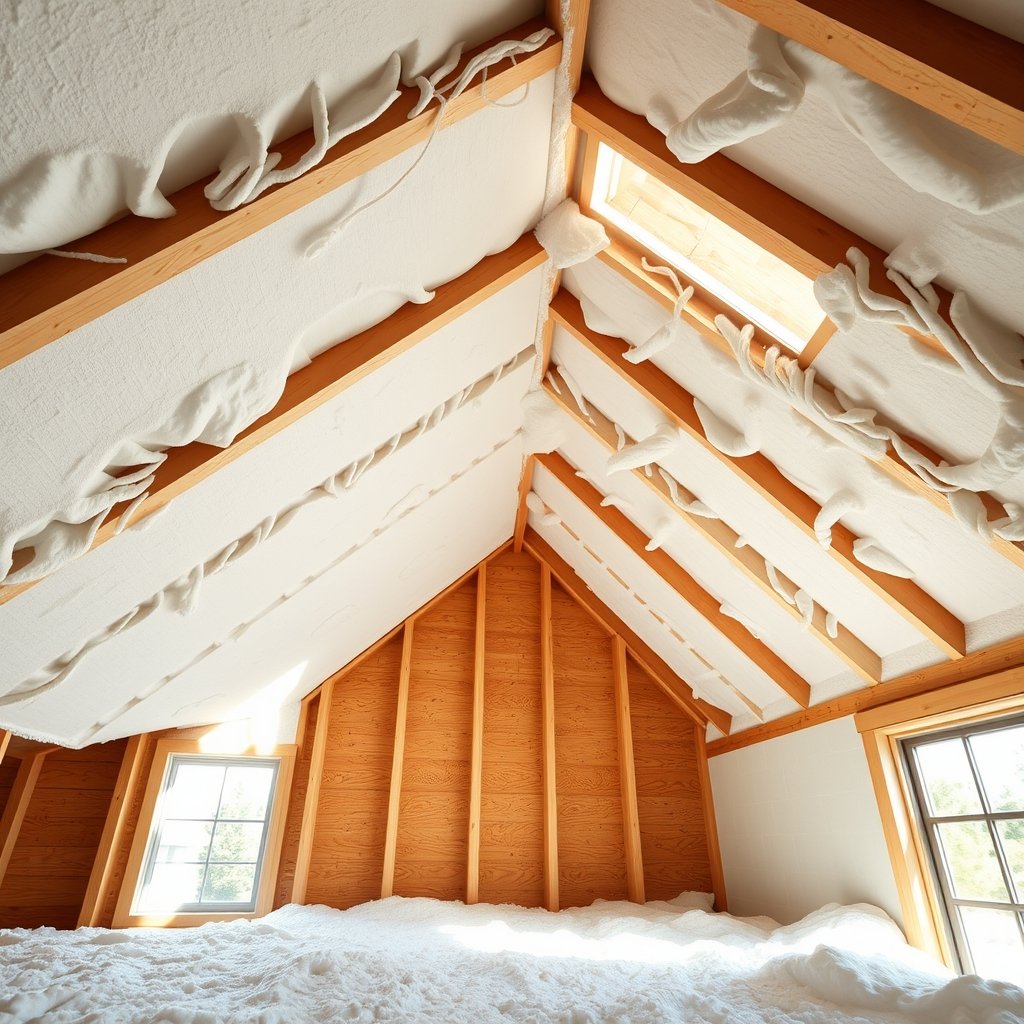
What drives the final price (quick checklist)
Many homeowners underestimate how much prep work can affect overall Spray Foam Insulation Cost on attic projects.
Here’s what actually affects your attic spray foam insulation cost:
- Foam type & density: Open-cell is cheaper, lighter, less moisture resistant. Closed-cell costs more, provides a vapor barrier and extra structural strength.
- R-value/required thickness: Colder climates and unvented attics may need 5–7 inches of foam for code, vs. 3–4 inches in warm climates and vented spaces.
- Job size & access: Smaller projects and hard-to-reach rafters push labor costs up per square foot.
- Prep & air-sealing: Blocking off gaps, prepping surfaces, protecting wiring and HVAC, and detailed masking all add labor (but skipping prep is a big mistake).
- Regional labor rates: Metro and northern areas are often pricier for both labor and materials.
- Cleanup or overspray repair: Some contractors include basic clean-up, but detailed cleaning, painting, or repair of soffits/gables can be extra.
- Local code requirements: Some regions require code-specific R-values or vapor barriers, driving both thickness and cost.
Material thickness and your region’s labor costs are the two biggest swing factors. See more details at [source].
Sample attic budgets & realistic project examples
Comparing multiple project scenarios is one of the best ways to estimate realistic Spray Foam Insulation Cost before requesting contractor quotes.
Let’s break down a real-world example for a standard 1,000 square foot attic:
- Closed-cell, unvented roof deck (cold climate, Zone 5–6, 6″ required): Material only: $3,600–$7,200 (DIY), Pro installed: $6,000–$12,000.
- Closed-cell, unvented, warm climate (Zone 3–4, 3.5″ required): Material: $2,100–$4,200, Pro: $3,500–$7,000.
- Open-cell, vented attic (top-up, 4″ thick): Material: $600–$1,200 (DIY), Pro: $1,500–$3,000.
- Hybrid (e.g., 2″ closed-cell with open-cell top-up): Pro: $4,000–$8,000.
Remember, smaller spot air-sealing projects are cheaper and can have the best ROI if your attic just needs leaks patched. For detailed breakdowns see this budget source.
Open-cell vs closed-cell — cost, performance and use cases
Understanding the differences between open cell vs closed cell spray foam is critical when building a cost-effective attic insulation plan. Here’s how they compare:
| Foam Type | Avg. 2024 Cost | R-Value / Inch | Air Sealing Performance | Moisture Barrier | Best Uses |
|---|---|---|---|---|---|
| Open-Cell | $1.5–$3.0 / sq ft | ~3.7 | Excellent | No | Attic floors, walls above grade, vented spaces, sound dampening |
| Closed-Cell | $2.1–$7.0 / sq ft | ~6.9 | Excellent | Yes – Vapor & air barrier | Unvented attic roof decks, crawl spaces, below grade, moisture-prone areas |
Open-cell is the budget pick for large attic floors and conditioned spaces but cannot provide a true moisture barrier. Closed-cell is denser, stronger, excels at vapor/moisture control, and is required by code for many roof deck or crawlspace applications (but at a much higher cost). Many homes use both types in different areas choosing the wrong foam type is a common reason Spray Foam Insulation Cost exceeds the original project budget. For more, check this guide.
R-value, code targets and the unanswered technical questions readers need answered
Required insulation thickness has a direct impact on Spray Foam Insulation Cost because material usage rises significantly in colder climate zones.
Spray Foam Insulation Cost R-value—the measure of resistance to heat flow—is what determines the thickness you’ll need for energy savings and code compliance. Open-cell foam typically delivers R-3.7 per inch, while closed-cell achieves roughly R-6.9 per inch. Most attics require total R-values (depending on climate zone) between R-38 and R-49.
- To meet R-38 with open-cell: You’ll need roughly 10–11 inches thick.
- To meet R-38 with closed-cell: About 5.5–6 inches thick.
But here’s what’s missing from most articles: Real-world R-value can drop if foam isn’t applied evenly, or if temperature/humidity conditions at install weren’t optimal. Ask your contractor to specify the R-value achieved & show you compliance with your local code. Also, some foams’ R-values degrade slightly over decades due to off-gassing, which is rarely disclosed upfront.
Quick way to estimate thickness for code: Divide your target R-value by the R per inch (i.e., R-38 ÷ 3.7 for open cell = 10.3 inches).
Spray foam vs blown-in (and when to choose which)
Should you pay more for spray foam, or stick with blown-in cellulose or fiberglass? Here’s how attic spray foam insulation compares:
| Factor | Spray Foam | Blown-in |
|---|---|---|
| Air Sealing | Excellent – tightest envelope | Fair – needs extra sealing |
| R-value per Inch | 3.7 (OC) / 6.9 (CC) | 2.7–3.8 |
| Disruption | Moderate/high (fumes, setup) | Low |
| Upfront Cost | High | Low |
| Risk of Mess | High (if poor masking) | Low |
| Potential ROI (energy savings) | 20–35% | 10–15% |
| Good for DIY? | Only small areas | Best for attics, rental equipment available |
Spray foam’s air-sealing yields significantly higher energy savings (many homeowners report 20–35% lower energy bills post-install). If your attic or crawlspace has major air leaks or needs a vapor barrier, foam often justifies its price—otherwise, blown-in can be smarter for top-ups, especially for DIYers on a tight budget. Learn more in Consumer Reports’ attic insulation comparison here.
DIY spray-foam kits — true cost, risks and missing safety guidance
It’s tempting to buy a DIY spray-foam kits at the hardware store—kits cost $300–$800 and claim to cover up to 200 sq ft at 1″ thickness. But the true cost is much higher when you include:
- Prep time (masking, protecting surfaces, sealing leaks)
- Personal protective equipment (PPE): full suit, gloves, and a proper respirator mask
- Ventilation needs and risk if off-gassing is mishandled
- Disposal of empty chemical containers
- Likely rework costs (uneven application, need to cut out “bad” foam, mess)
- Lack of warranty and potential issues with home insurance or code
DIY mistakes often increase total Spray Foam Insulation Cost due to cleanup, material waste, and expensive rework.

Major sources fail to address that most DIYers underestimate both the mess and the safety risk of improper application; accidental overspray and bad mixing can cost more to fix than paying a pro.
Most common homeowner complaints — what to watch for after install
Attic spray foam insulation and crawlspace projects often result in specific and frequent homeowner complaints. Be aware of the issues below, and use this checklist to keep your installer accountable:
- Strong chemical odors/off-gassing that linger after install. This usually points to poor ventilation during curing or incorrect foam ratio/mixing.
- Uneven or thin coverage, leaving cold spots in attic/ceilings. Rushed or careless installers are often to blame—insist on photos or walk-throughs before payment.
- Excessive mess or overspray on wood, wiring, or windows. Poor prep or masking. Confirm how overspray will be cleaned up and put it in your contract.
- Higher-than-expected total costs due to “extras.” Always get a line-item bid for foam type, thickness, prep, disposal, and warranty before work begins.
- Shrinkage or delamination of foam within months/years. Can occur from improper surface prep or rushing application in low temps—ask for details about installer experience and guarantee policies.
Carefully reading recent local reviews for spray foam insulation contractors near me will help you avoid these traps.
How to vet and hire a contractor — checklist and essential questions
Hiring an attic spray foam installer is not like replacing a furnace—transparency and detail in the bid are essential. Before you sign, insist on:
- Detailed written quote: Ask for a per-square-foot price, specified type & brand of foam, air sealing details, required thickness and R-value performance goals, line-item prep/cleanup/waste fees, and total after tax.
- Installer certifications: Look for SPFA (Spray Polyurethane Foam Alliance) accreditation or equal credentials.
- Proof of insurance and recent references: Call at least two customers with similar projects.
- Performance warranty: Insist on a five-year minimum guarantee against shrinkage, delamination, cold spots, and odors.
- Clear rework and complaint process: Who pays to fix foam failures? Many negative reviews stem from surprise rework costs.
- Red flags in reviews: References to missed code/R-value, incomplete cleanup, or price increases post-contract are dealbreakers.
If the contractor won’t answer every technical question and provide proof, keep shopping—many homeowners report unexpected surprise costs and rework. Demand everything in writing for protection.
Payback, energy savings and the decision framework
A well-installed spray foam attic can cut whole-home energy bills by about 20–35%. If you spend $3,000 per year on heating and cooling, that’s $600–$1,050 savings every year—a typical installed foam project (around $8,000) could pay for itself in 8–13 years, often sooner if you’re also downsizing HVAC or solving a comfort problem.
- Best ROI: Homes with old, leaky attics or complex rooflines get the biggest savings boost.
- Get 3 quotes: Always compare pro bids side by side; request per-square-foot, thickness, project scope, warranty, and prep/cleanup.
- Consider hybrid upgrades: Use closed-cell only where required by code or moisture, and open-cell elsewhere to control project costs.

By knowing the averages, asking for specifics, and catching the trade-offs up front, you’ll avoid the most expensive mistakes. For most homes, attic spray foam insulation delivers real energy savings and comfort—if installed thoughtfully with the right questions asked.
FAQ Section
How can I estimate the attic spray foam insulation cost for my home?
Multiply your attic square footage by the average per-square-foot cost for your chosen foam type: use $2.25 (open-cell) or $4.00 (closed-cell) as a starting point. Always confirm required thickness by your climate zone and local code before finalizing your budget.
Is spray foam insulation worth it in an old house attic?
Usually, yes—if your attic is leaky, has lots of penetrations, or you deal with big temperature swings, spray foam’s air-sealing will often cut energy bills 20–35% and provide year-round comfort. The upfront cost can be high, so compare total payback and consider spot air-sealing if not ready for a full upgrade.
How do I spot a bad spray foam insulation contractor?
Red flags include pushy “one-day” sales pitches, lack of written quotes with foam type and R-value details, no stated prep or cleanup plan, references to only “generic foam,” and no warranty. Search for negative reviews mentioning odors, incomplete coverage, or unfinished jobs.
Are DIY spray foam insulation kits a good value?
Only for very small, simple jobs with excellent ventilation and easy access. For most attics, hidden costs and health risks (PPE, potential for mess, rework) quickly erase any savings—most homeowners should hire a reputable pro. Always read safety guidance and disposal instructions.
How thick does spray foam need to be in the attic to meet code?
This varies—use about 10–11 inches for open-cell and around 6 inches for closed-cell to meet R-38 to R-49 required in most attics. Code minimums change by climate zone so always confirm with your local building authority or contractor familiar with local rules.

[…] basic demolition or painting yourself. Not sure if insulation or climate strategy will pay off? Our spray foam insulation guide breaks down real-world costs and […]
[…] To learn how proper insulation adds to ROI for major home projects, see our guide on spray foam insulation cost. […]